
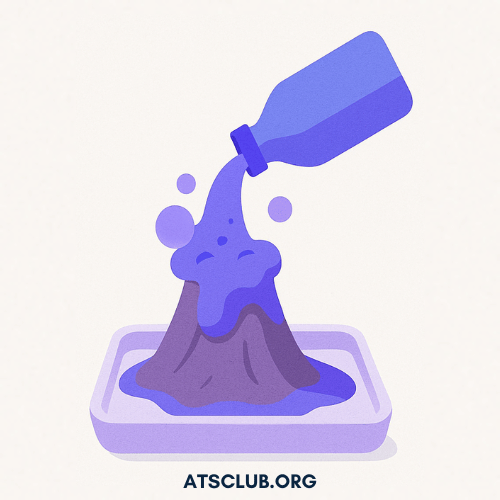
The Ultimate Guide to Volcano Experiments for Kids (2025)
Learn how to make fun volcano experiments for kids using baking soda, vinegar, lemons, pumpkins, and more. Full step-by-step guide.

What is a Volcano Experiment?
A volcano experiment is a hands-on science activity that simulates a volcanic eruption—usually using simple ingredients like baking soda and vinegar. While it doesn’t produce real lava, the reaction mimics the explosive release of gas and pressure you’d find in actual volcanoes.
Most versions of this experiment rely on an acid-base reaction, which creates a fizzy, foamy eruption. Kids love the visual wow factor, but there's more going on than just a bubbly mess.
Baking soda volcano experiments help students explore concepts like:
- Chemical reactions
- Gas formation
- Earth science and geology
- Scientific observation and prediction
And the best part? You don’t need any fancy science equipment—just a few things from your kitchen.
How to Make a Volcano Science Experiment (Step-by-Step for Kids)
If you've never made a homemade volcano before, you're in for a treat. This experiment is easy to set up, wildly satisfying to watch, and a great way to introduce basic chemistry. Here's everything you need to create your own erupting volcano right at home (or in the classroom).

What You'll Need
Most of these items can be found in your kitchen or a local grocery store:
- 1 small container (like a plastic cup or water bottle)
- Baking soda (about 2–3 tablespoons)
- Vinegar (½ cup)
- Dish soap (1–2 squirts, optional but helps with foamy lava)
- Food coloring (red, orange, or any “lava” color you like)
- A tray, pan, or large dish to contain the mess
- Construction paper, clay, or Play-Doh (optional—for building your volcano mountain)
Step-by-Step Instructions
1. Build your volcano
Place your container in the center of a tray. If you'd like, shape a volcano mountain around it using clay, dough, or even paper. Make sure to leave the top open so you can pour things in.

2. Add the lava ingredients
Into the container, add:
- 2–3 tablespoons of baking soda
- A few drops of dish soap
- Several drops of food coloring

3. Get ready for the eruption
Slowly pour vinegar into the container and watch the eruption happen! The bubbly foam will rise and flow just like lava.
4. Repeat the fun
Want to go again? Just add more baking soda and vinegar!
What’s Happening Here? (The Science)
This classic volcano experiment is powered by an acid-base reaction.
- Baking soda = a base (sodium bicarbonate)
- Vinegar = an acid (acetic acid)
When combined, they create a chemical reaction that produces carbon dioxide gas. That gas builds up quickly, pushing the liquid out of the container in a bubbly eruption. The dish soap traps the gas in bubbles, making the eruption even foamier.
This is a great way to introduce scientific concepts like:
- Reactions between substances
- Gases you can’t see
- How pressure builds and escapes—just like in real volcanoes
Different Ways to Do a Volcano Experiment (Easy DIY Variations)
Once you've tried the classic baking soda and vinegar volcano, there are tons of fun ways to mix it up! These variations use seasonal or unexpected materials to keep kids curious and engaged—all while reinforcing the same core science concepts.
Lemon Volcano Experiment 🍋
This version is perfect for little hands and curious minds.
What You’ll Need:
- 1 lemon (cut in half)
- Baking soda
- Food coloring
- A spoon or craft stick
- Optional: dish soap

Instructions:
- Hollow out a bit of the lemon center with a spoon (but leave some pulp).
- Add a few drops of food coloring to the hollowed-out part.
- Sprinkle in some baking soda.
- Use a spoon or stick to squish and mix the pulp—watch it fizz and bubble!
Why it’s cool: Lemons are acidic, so they react naturally with baking soda—no vinegar required!
Full guide: How to make a Lemon Volcano →
Apple Volcano Experiment 🍎
A sweet twist that’s great for fall science activities.
What You’ll Need:
- 1 apple (core it halfway)
- Baking soda
- Food coloring
- Vinegar

Instructions:
- Core the apple about halfway down.
- Add food coloring and baking soda into the hole.
- Slowly pour in the vinegar and watch it erupt from the apple “crater.”
Why it’s cool: Apples are sturdy and smell great—plus, it’s a fun seasonal tie-in.
Full guide: How to make an Apple Volcano →
Pumpkin Volcano Experiment 🎃
Fall is the perfect time to carve up something other than a jack-o'-lantern.
What You’ll Need:
- A small pumpkin (top cut off and insides scooped out)
- Baking soda
- Vinegar
- Dish soap (optional for more foam)
- Food coloring

Instructions:
- Scoop out your pumpkin like you're making a jack-o’-lantern.
- Fill the bottom with baking soda and a few drops of food coloring.
- Add a squirt of dish soap for extra fizz.
- Pour in the vinegar—and watch the bubbly “lava” spill out!
Why it’s cool: It’s festive, messy, and a great way to reuse pumpkins after Halloween.
Full guide: How to make a Pumpkin Volcano →
Snow Volcano Experiment ❄️
Great for winter learning or snow day fun—no classroom required!
What You’ll Need:
- Fresh snow (or crushed ice if indoors)
- A cup or small container
- Baking soda, food coloring, and vinegar

Instructions:
- Fill a small container with baking soda and food coloring.
- Bury the container in a snow mound, leaving the top open.
- Pour in vinegar and watch the colorful lava ooze out of your snow volcano!
Why it’s cool: The contrast between the warm eruption and the cold snow is visually awesome—and safe for outdoor play.
Full guide: How to make a Snow Volcano →
Coca-Cola Volcano Experiment🥤
This twist adds fizzy fun—and a lesson in chemical reactions with soda.
What You’ll Need:
- Diet Coke or regular Coke
- Mentos candies (or baking soda)
- Optional: A funnel and tall plastic bottle

Instructions:
- Set the bottle on a tray or outdoor surface.
- Drop in a few Mentos and step back!
- For a slower eruption, try mixing baking soda with Coke instead.
Why it’s cool: It's fast, dramatic, and shows a physical reaction (gas buildup) in action. Plus, kids love using soda.
Full guide: How to make a Coca-Cola Volcano →
💡 Tip for Parents & Teachers: Encourage kids to compare each version. Which one erupts the fastest? Which lasts the longest? They’re all using the same basic idea—just different materials.
The Science Behind Mini Volcano Experiments
Volcano eruption experiments aren’t just fun science activities—they’re a great way to introduce students to how volcanoes work and explore basic chemistry in action. Behind every fizzy explosion is a powerful (and safe) chemical reaction that mirrors the forces inside a real volcano.
Here’s what’s really happening when your volcano "erupts."
The Reaction: Acid + Base = Explosion (Fizz)
The classic volcano experiment relies on two common kitchen ingredients:
- Baking Soda (Sodium Bicarbonate) – a base
- Vinegar (Acetic Acid) – an acid
When you combine them, they create a chemical reaction that forms carbon dioxide gas (CO₂). That gas builds up and escapes quickly, creating bubbles and foam that mimic an eruption.
NaHCO₃ (baking soda) + CH₃COOH (vinegar) → CO₂ (gas) + H₂O (water)
You don’t need to memorize that—but it’s cool to know your experiment is powered by real chemistry!
How This Connects to Real Volcanoes
In real volcanoes, pressure builds up underground as molten rock (magma) heats up and forms gas. When the pressure gets too high, the volcano erupts—just like the gas in your experiment pushes the foam out of your volcano.
Key Concepts Kids Can Learn:
- Chemical reactions (acid + base)
- Gas formation (carbon dioxide)
- Pressure and eruption
- Earth science connections (how real volcanoes work)
Add Some STEM Thinking:
Want to make this experiment more educational? Try introducing a few of these ideas:
- Make predictions: What happens if you add more vinegar? What if you use lemon juice instead?
- Track variables: Try different container shapes and see how they affect the eruption.
- Graph your results: How long does each eruption last? How high does the foam go?
How to Turn It Into a Science Fair Project
Turning your volcano experiment into a science fair project is easier than you think. With just a few added steps, your fun at-home activity can become a structured investigation that teaches the scientific method—and impresses at the fair.
Here’s how to level it up.
Step 1: Ask a Question
All great science projects start with a question.
Try something like:
- What ratio of vinegar to baking soda makes the biggest eruption?
- Does the shape of the volcano affect the speed of the eruption?
- Will lemon juice work as well as vinegar?
Step 2: Make a Hypothesis
Now, have your child make an educated guess (this is a great critical thinking skill!).
Example:
“I think more vinegar will make the eruption faster because it creates more gas.”
Step 3: Set Up the Experiment
This is where the volcano fun begins! Use the classic setup, but change one variable at a time so you can test your hypothesis.
Some variables to try:
- Type of acid (vinegar vs. lemon juice)
- Amount of baking soda
- Size/shape of the container
- Temperature of the vinegar
Keep everything else the same for accurate results!
Step 4: Record the Results
Encourage your student to write down:
- What happened during each eruption
- Measurements (height of lava, time until eruption, etc.)
- Any surprises or changes
You can even use a stopwatch, ruler, or simple data table.
Step 5: Analyze and Conclude
Ask:
- What worked best?
- Was the hypothesis correct?
- What might you do differently next time?
This is the real scientific thinking part—and it’s where the learning sticks!
Step 6: Build Your Display Board
If you're entering a science fair, your display should include:
- Title of your project
- The big question
- Hypothesis
- Materials list
- Procedure (with step-by-step photos if possible)
- Data/results
- Conclusion
- Bonus: Real volcano facts or photos!
💡 Tip: Add a small model of your volcano to your display. Bonus points for creativity!
Parent & Teacher Tips
Whether you're leading a group of excited students or helping your child at home, volcano experiments can get a little… explosive. The good news? With just a few simple tweaks, you can turn this fun activity into a safe, manageable, and meaningful learning experience.
Make It Age-Appropriate
For younger kids (ages 4–7):
- Focus on the wow factor
- Let them help pour and mix with supervision
- Talk about “bubbles” and “gas” in simple terms
For older kids (ages 8–12+):
- Introduce the scientific method
- Explore acids and bases more deeply
- Encourage them to try variables and track results
Group Activity Tips (Teachers & Educators)
Running this in a classroom or group setting?
Here’s how to keep it smooth:
- Set up stations ahead of time with pre-portioned materials
- Use plastic trays or cookie sheets to contain mess
- Assign roles: one student pours, one records data, one cleans up
- Build the volcanoes ahead of time and store them in bins
Bonus idea: Make it a rotating station activity as part of a bigger STEM day!
Keep the Mess Under Control
Let’s be real—lava goes where it wants.
- Always use a tray or shallow bin under your volcano
- Put down newspaper, a tablecloth, or plastic wrap
- Keep paper towels nearby for spills
- For outdoor fun, sandboxes or grass are perfect backdrops
Safety Reminders
Even though this experiment uses household materials, it’s still good to review safety:
- Don’t let kids taste or touch the mixture
- Vinegar can sting if it gets in eyes—watch for splashing
- Wash hands after handling materials
- Use non-breakable containers
For Homeschoolers and After-School Programs
This is a perfect project for STEM enrichment—especially when combined with reading, writing, or art.
Ideas:
- Create a volcano journal entry
- Have kids draw and label parts of a volcano
- Tie the experiment into a geography or earth science lesson
Looking for a STEM club or after-school class?
See how we bring hands-on science to schools →
Safety Guidelines and Cleanup Tips
Volcano experiments are simple and safe, but things can still get a little messy—especially when excited kids are involved! With a few easy precautions and smart cleanup tricks, you'll be ready for a smooth and stress-free eruption.
Safety First: Quick Rules for Kids
Before you get started, set some simple classroom expectations. Here are a few we like to use:
- Look with your eyes, not your hands (unless you're the scientist doing the pouring!)
- No tasting the ingredients—even if they smell familiar.
- Stay seated or standing still while the experiment is happening.
- Keep the eruption zone clear—one person pours while everyone else watches.
Material Safety Notes
- Vinegar is safe, but can sting if it gets in eyes or on small cuts.
- Food coloring may stain hands or clothes—wear aprons or old t-shirts.
- Baking soda is non-toxic but should still be used with care to avoid spills.
For extra protection:
- Use goggles for a fun scientist vibe and eye safety.
- Lay down a plastic tablecloth or large trash bag as a workspace.
Easy Cleanup Tips
Volcanic eruptions are fun, but the cleanup can be messy. Here’s how to keep it quick and painless:
- Do the experiment on a tray or in a shallow bin to contain overflow.
- Wipe up spills right away to prevent vinegar smell or food coloring stains.
- Toss used materials (like paper volcano wrappers) in the trash.
- Wash hands and any reusable tools with warm, soapy water.
💡 Pro tip: Add a few drops of essential oil or lemon juice to your vinegar mix to cut the smell and make the classroom (or kitchen) smell nice afterward.
STEM Learning Extensions
A volcano experiment is a great starting point—but it can also launch a whole world of discovery. Whether you want to turn this into a full STEM lesson, a science journal activity, or an art-and-science mashup, here are some simple ways to expand the learning.
Explore the Scientific Method
Once you’ve done the basic eruption, ask:
- What happens if we change the amount of vinegar?
- What if we switch out baking soda for something else?
- Which version erupts the fastest or tallest?
Let kids design their own mini-experiments:
- Identify variables
- Make predictions
- Track and chart results
- Write a conclusion
Add Some Math
- Measure how much vinegar or baking soda you use
- Time each eruption with a stopwatch
- Create a bar graph comparing results
- Estimate how much “lava” came out
Simple math = real data science!
Tie It into Reading & Writing
- Read a picture book about volcanoes
- Write a short story about a “day in the life” of a volcano
- Create a volcano experiment report using drawings and labels
Add an Artistic Element
- Paint or decorate your volcano model
- Make a poster or diorama of a volcanic island
- Create a comic strip showing a volcano coming to life
Connect to Real-World Geography
- Look at a map of where real volcanoes are found
- Learn about famous volcanoes like Mount Vesuvius or Mauna Loa
- Talk about how volcanoes shape Earth’s surface over time
Use this as a launchpad into Earth science lessons:
- Tectonic plates
- Lava vs. magma
- Volcano types (shield, cinder cone, composite)
How to Do Volcano Experiments at Your Student’s School 🌋
Volcano experiments are a great way to introduce students to hands-on science while exploring chemistry and the inner workings of volcanic eruptions.
At All Things Science, we run weekly STEM programs at K–8 schools, where students dive into exciting topics like chemical reactions, rocketry, robotics, 3D printing, and more.
Want to bring fun volcano experiments to your student’s school?
Learn how to get All Things Science on your campus →
Volcano Experiment FAQ
Q: How to make a volcano science experiment at home?
A: To make a volcano science experiment at home, use baking soda, vinegar, and a small container. Build your volcano using clay or Play-Doh around the container, add your ingredients, and pour in vinegar to create a bubbly eruption. It’s safe, simple, and great for hands-on learning.
Q: How to make different types of volcano science experiments?
A: You can make volcano experiments using ingredients like baking soda and vinegar with different materials. Try classic volcanoes, lemon volcanoes, pumpkin volcanoes, snow volcanoes, Coca-Cola volcanoes, or mini volcanoes. Each one puts a fun twist on the same core science idea.
Q: How do you make a volcano experiment for a science fair?
A: To make a volcano experiment for a science fair, choose a question to test (like how much vinegar creates the biggest eruption). Build your volcano, test one variable at a time, track your results, and present your process on a display board using the scientific method.

March 29, 2025
Know a School We Should Come To?
Take a Look at our Featured Articles
Dive into the vibrant world of STEM through articles from your favorite scientists and engineers, all in one place.


Join the 1000+ families enrolled in All Things Science
Tell us where to send you some free STEM resources today.


